
Mia NovakNovember 19, 2026
Eventually the credits roll. Jason and Lucia have finished their story, you've sunk dozens of hours into Leonida, and then a new entry shows up in the menu: the 100% checklist. Open it and you see 35 lines with numbers like “0 of 397”. That's usually the moment people wonder whether anyone can really pull this off. The honest answer: yes, and it's less than it looks. For 100%, GTA 6 only asks for a part of what's in the game, but for a few tasks it really wants every single piece.
In this guide we go through all 35 tasks: what unlocks when, which numbers actually count, and where you save time or lose it. At the end you'll find the complete checklist to tick off and our take on who the hunt is worth it for.
- The checklist only appears after the story ends, in the menu under Progress, Stats, 100% Completion
- Story progress already counts beforehand, so you lose nothing
- Reward: the trophy or achievement “A Long Road”
- Nothing is missable, everything can be done after the story in free roam
- Only banks, vaults, gang operations, payday loans, underwater finds, shooting ranges, drone races and Bret's hunting jobs need to be completed in full
- Everything else only needs part of the total, for example 100 of 125 flamingos or 300 of 397 stunts
Where to find the 100% checklist
Rockstar hides the list until the very end. While the main story is running you can't open it, even though the game is already tracking everything in the background. It only appears in the pause menu after the last of the 91 main missions, under Progress, Stats, 100% Completion. Every bank job and every flamingo you've done before is already ticked off by then.
That has an upside many people underestimate: if you collect on the side during the story, you don't start from zero after the credits but often from around a third. How long the story itself takes depends heavily on your pace. IGN's review talks about roughly 45 hours for the campaign, noticeably more with lots of side activities.
One worry we can take off your plate right away: nothing on the list is missable. Gang operations come back after a while, Kenton and Bret stay reachable after the story, and the bank jobs keep running in free roam. A few optional tasks do disappear during the story, but there are several hundred of them and you only need 100.
The good news: 100% doesn't mean everything
If you know the compendium from Red Dead Redemption 2, you can breathe easy in GTA 6. Rockstar has deliberately set the bar low this time. A few examples: out of 277 vehicle models you only need to scan 200. Out of 255 animal species 100 are enough, and unlike in Red Dead you don't have to hunt and skin them, a look through the binoculars is all it takes. Out of 397 stunts you need 300, and it doesn't matter which ones.
The guide site PowerPyx therefore estimates the effort at about 60 percent of what's really in the game. The catch: in a few places GTA 6 really does want everything. Those are exactly the tasks that cost the most time or skill, and the next sections are about them.

Heists: the part that makes you rich
A quarter of the checklist is about robbing, and it's the most lucrative part. The story sets the order for you. Pawn shops open up in Chapter 2 after the mission “Coffee Break”, jewelry stores in Chapter 3 with “Yasmani's Jewelry Jobs”. Also in Chapter 3, “Credit Check” gives you the dye pack jammer, without which marked bills from banks and payday loans would be worthless. Only after that do the 22 bank jobs and 7 payday loans make sense, and you need both in full.
Small banks always consist of a teller drawer and a safe, and both have to be cleaned out or the job doesn't count. The eight big banks also have a vault, which you can only crack near the end, after the optional Chapter 4 mission “That's Where The Money Is…”. The trick: you follow an armored truck, wait until the guard opens the vault, and then strike. Up to $205,000 per bank is up for grabs. If you want to skip the truck hunt, you can buy a tip from Yasmani for $10,000 once you've done two payday loans for him.
Our tip: A vault job instantly gets you four wanted stars. Park a fast motorcycle around the corner beforehand, weave through traffic with it, then swap vehicles to become inconspicuous again. Bring your partner, because past a certain amount of loot you can't carry any more bags and simply hand them over.
You spot the 39 gang operations by yellow icons as soon as you get close, and the story marks 19 of them automatically. Hover your cursor over the icon and you'll see how many key valuables are inside. An operation only counts as done if you collect all of them. Good news for the forgetful: the gangs come back after a while. For the Stick Ups, 50 of 91 stores are enough. Gun on the cashier, take the cash, get out, done.
The four fence goals almost take care of themselves. You'll hit $250,000 in marked bills with a single big bank, the $100,000 in drugs comes from gang operations and cocaine flamingos, and for $200,000 in vehicles Randy's wish list from Chapter 3 is enough: for a sports car in perfect condition he pays a good $35,000. You'll find more about money and heists in our wiki under Heists and Selling stolen goods.
| Heist | Required | Unlocked |
|---|---|---|
| Bank jobs | 22 of 22 | Chapter 3, “Credit Check” |
| Vaults | 8 of 8 | Chapter 4, optional mission |
| Payday loans | 7 of 7 | Chapter 3, “Credit Check” |
| Smash 'N' Grabs | 34 of 35 | Chapters 2 and 3 |
| Gang operations | 39 of 39 | from the start, 19 through the story |
| Stick Ups | 50 of 91 | from the start |
We already have many banks, pawn shops and jewelers on the map, with approximate locations from the walkthroughs: show all heists on the map.
Collectibles: flamingos, cards and magazines
Now it gets fiddly. The best-known collectibles are the 125 cocaine flamingos, of which you have to destroy 100. Watch the beak: only the flamingos with a black and white beak are filled. The ones with a yellow and black beak are just decoration and can't be shot. One shot to the belly is enough, then a package of cocaine drops out, which you turn into cash at the fence.
The trading card collection is bigger: 480 cards spread over 18 sets of 18 to 36 cards each, from sports teams to comic heroes. For 100% you need 15 complete sets, so you can skip three. Some cards can be found in several places, and duplicates can be sold at pawn shops. You can check your progress in the menu under Progress, Collections, Trading Cards.
On top of that come 30 of 34 magazines, books and comics (including the seven book swap boxes), 100 WAiNK spots that you scan with your phone camera as soon as a hint appears on screen, and 2 playlists that you unlock via posters. The “Styles” category with 70 of 79 entries is a mix of tattoo designs in magazines and 34 luxury watches. You recognize the watches by a golden icon, and they almost always lie in gang operations.
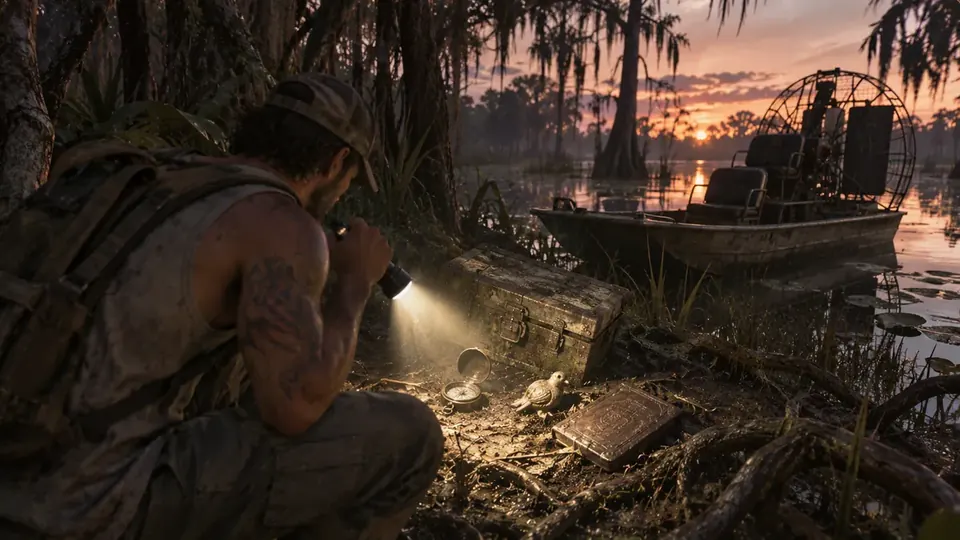
Our map shows the known locations in separate categories, and the community keeps adding more: cocaine flamingos on the map, trading cards on the map and magazines and playlists on the map. With the checkmark in the popup you mark what you already have. You can then see your progress per category in My Area.
Underwater: Kenton's treasure wrecks
One section of the list takes you out to the Keys. Kenton, whom you meet in Chapter 1 through the mission “Island Dreams”, runs a shop in Key Lento and sends you, step by step, to seven shipwrecks. With the metal detector you dig up treasure on the seabed and bring it back to him. The checklist only asks for 5 of 7 sets, but careful: you need all 33 underwater finds, and you only get them with all seven wrecks. In practice that means: do them all.
Kenton briefly vanishes from the map after Chapter 1, but comes back between Chapters 2 and 3. So no need to panic. You'll find more about diving in the wiki under Scuba diving, and we introduce the area itself under Leonida Keys.
Stunts: 300 of 397, and bridges are your friend
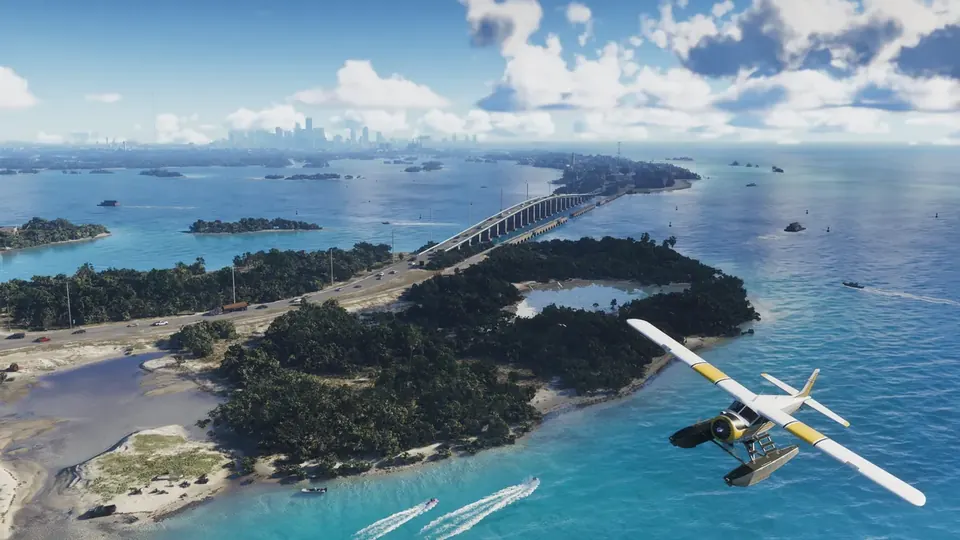
Stunts are the biggest single task on the list and at the same time the most flexible. There are four kinds: 130 stunt jumps over ramps, 202 bridge flights where you fly a plane under a bridge, 40 knife-edge flights through tight gaps between buildings and 25 base jumps with the parachute. That adds up to 397, you need 300, and you can mix freely.
The fastest way leads under the bridges. A nimble plane, a route along the coast and the canals, and the number climbs by the minute. Stunt jumps on a motorcycle are more fun but cost more time because you have to ride to every ramp. Every stunt has its own name and stays marked on the map once done. In the menu you can see your progress per region. The bonus goals that appear when you drive over an icon, by the way, aren't needed: completing it once is enough.
You'll find the first stunt jumps on our map under Stunts. How it feels with the parachute is described in our wiki under Base jumping.

Activities: shooting ranges, drones, basketball and more
This is where the real challenge lies, because a few activities demand not just time but skill. First and foremost the shooting ranges: Griffin Shooting Range and Rodgers Ranch offer twelve disciplines between them, and you need gold in every one, 42 gold medals in total. Beforehand you buy a liability waiver from the clerk in the shop for $5, and only then do the disciplines appear. More in the wiki under Shooting range.
Just as strict are the drone races from Top Fun: 14 tracks with three timed races each, and you need all 42. Sounds brutal, but it's kinder than you'd think. In the first two runs of each track you have to beat the best time, in the third it's enough to reach the finish. Our tip: hold the left stick forward the whole time and rather fly one more curve than crash into a wall.
The other activities are more relaxed. Of 40 races you have to win 30, and you need gold in 10 of 13 race challenges. For the 100 basketball hoops one hit per hoop is enough, and you need 90 different hoops, sinking 90 shots at the same hoop doesn't count. Beat five of seven pool opponents in bars and cafés, play two of three mini golf courses (King Gator Adventure Golf, Frontier Adventure Golf and Dino Golf Challenge), and start all four video games. You play three of them on the TV in your apartment, “Bang For Your Buck” only at the arcade machine. Starting and quitting right away is enough.
Two tasks hang on characters. You do the meditations at ten locations, and because Jason and Lucia count separately, you get to 18, of which 15 are needed. Call your partner, go together, and you get double. Bret Vogel contacts Jason by message after “Coffee Break” in Chapter 2, Lucia doesn't get this message. For 100% you need all 15 of his hunting jobs. Clean shots to the head or heart pay more, shot-up animals are worthless. More about hunting in GTA 6 in the wiki under Hunting.
And then there are the 80 challenges in eight categories: Combat, Crime, Exploration, Fitness, Shopping, Sports, Survival and Vehicles, ten per category. 70 are enough. Save them for last, because you'll complete most of them along the way, and at the end you only pick the easiest leftovers.

We've also entered the drone tracks, races, shooting ranges and golf courses: show activities on the map.
Discover: scanning cars, collecting weapons, watching animals
The last three tasks are the most relaxed, and you should start on them right away. With the WAiNK app on your phone you scan passing vehicles, and you need 200 of the 277 base models. The best approach is to stand at busy roads in different areas: supercars drive in front of the hotels in Ocean Beach, vans and trucks more in Port Gellhorn, plain everyday cars in Key Lento. Boats and planes count too. The roughly 280 one-off vehicles at fixed locations don't count, on the other hand.
For weapons you need 50 of 66 standard weapons, including melee weapons and explosives. Holding one in your hand once is enough, whether bought or taken from an enemy. Ammu-Nation stores marked “Advanced” carry the full range, more about that in the wiki under Ammu-Nation. And for the animals you pick the binoculars on the weapon wheel, zoom in and hold the button to study. Every dog and cat breed counts individually, and you can study fish while swimming. You'll find lots of wildlife in the swamps and in the north around Mount Kalaga National Park.
The best order: how to save yourself hours
Most completionists don't lose time on the hard tasks but because they drive through the same area five times. So here's our suggested order:
- From minute one: scan every new car, study every new animal, take every WAiNK hint. It costs nothing and knocks out three lines of the list on the side.
- During the story: accept new side tasks right away. They often introduce systems you'll need later, and the 100 optional tasks fill up on their own.
- Area by area: when you head to a region, take everything that lies there: flamingos, cards, basketball hoops, stunts. Our map shows you the known spots, and with “Show only not yet found” you see what's missing.
- After Chapter 3: do banks, payday loans and jewelry stores in one go. After that you have enough money for everything else.
- After the story: vaults, shooting ranges and drone races once you've got the controls down. Last of all, the remaining challenges.

Our verdict
GTA 6's 100% list is fair. Rockstar doesn't force you to hunt every animal or scan every car, and the generous buffers on flamingos, cards and stunts take a lot of frustration out. If you like exploring the world anyway, you'll get half the list done just by playing normally.
It doesn't go entirely without gritted teeth, though. The 42 gold medals at the shooting range and the 42 drone races demand real skill, the 33 underwater finds demand patience, and with 202 bridge flights you eventually notice you're just collecting checkmarks. If you loved the story and don't want to leave Leonida, the hunt for “A Long Road” is still worth it: you'll see corners of the map you'd otherwise have driven past. If you only want the trophy, plan on several weekends rather than a few evenings.
To be honest: we're relying here on the lists from PowerPyx and Rock Paper Shotgun, which match on all 35 points, and on players' first experiences since release. Once we've been through it ourselves, we'll add our own tips to this guide.
The complete 100% checklist
All 35 tasks at a glance, sorted as in the game menu:
| Category | Task | Note |
|---|---|---|
| Story | Complete the main story | all 91 main missions |
| Story | 100 optional tasks | come almost on their own while playing |
| Heists | 39 of 39 gang operations | collect all key valuables |
| Heists | 22 of 22 bank jobs | from Chapter 3, mission “Credit Check” |
| Heists | 7 of 7 payday loans | from Chapter 3, mission “Credit Check” |
| Heists | 34 of 35 Smash 'N' Grabs | pawn shops from Chapter 2, jewelry stores from Chapter 3 |
| Heists | 50 of 91 Stick Ups | gas stations, fast food, liquor stores |
| Heists | 8 of 8 vaults | big banks, from Chapter 4 |
| Fence | $100,000 in drugs sold | from gang operations and flamingos |
| Fence | $100,000 in jewelry sold | from jewelry stores |
| Fence | $250,000 in marked bills sold | from banks and payday loans |
| Fence | $200,000 in vehicles sold | from Chapter 2 at Moses |
| Explore | 5 of 7 Kenton sets | treasure diving in the Keys |
| Explore | 15 of 18 trading card sets | 480 cards in total |
| Explore | 100 WAiNK spots scanned | landmarks and sculptures by phone |
| Explore | 33 of 33 underwater finds | practically all 7 wrecks |
| Explore | 30 of 34 magazines, books & comics | including 7 book swap boxes |
| Explore | 15 of 18 meditations | 10 spots, with Jason and Lucia |
| Explore | 100 of 125 cocaine flamingos | black and white beak |
| Explore | 2 of 2 playlists | scan posters |
| Explore | 70 of 79 styles | tattoos from magazines and 34 luxury watches |
| Activities | 30 of 40 races won | blue icons on the map |
| Activities | 10 of 13 race challenge golds | drive best times |
| Activities | 42 of 42 shooting range golds | two shooting ranges, all disciplines |
| Activities | 4 of 4 video games | three at home, one at the arcade machine |
| Activities | 5 of 7 pool opponents | in bars and cafés |
| Activities | 2 of 3 mini golf courses | playing once is enough |
| Activities | 90 of 100 basketball hoops | one hit per hoop |
| Activities | 42 of 42 drone time trials | 14 tracks with 3 runs each |
| Activities | 300 of 397 stunts | jumps, bridges, knife-edge flights, base jumps |
| Activities | 70 of 80 challenges | 8 categories with 10 each |
| Activities | 15 of 15 hunting jobs from Bret | only as Jason |
| Discover | 200 of 277 vehicles scanned | WAiNK app |
| Discover | 50 of 66 standard weapons | buying or picking up is enough |
| Discover | 100 of 255 animals studied | with the binoculars |
Want more? In our list of all cheats and collectibles you'll find every known code, the wildest secrets are in our GTA 6 Easter eggs, and how big the area is that you have to search is explained in our article on the size of the map.
Frequently asked questions about 100% in GTA 6
How many tasks does the 100% checklist in GTA 6 have?
35. They are split into three areas: Story and tasks, Exploration and activities, and Discover.
Where do I find the 100% checklist?
Only after the story ends, in the pause menu under Progress, Stats, 100% Completion. Story progress counts before that already, though.
Can you miss anything for 100% in GTA 6?
No. All tasks can also be done after the story in free roam. A few optional tasks do disappear, but there are far more than the 100 you need.
How many cocaine flamingos do I need for 100%?
100 of 125. Only flamingos with a black and white beak count, the ones with a yellow and black beak are decoration.
How many trading cards are there in GTA 6?
480 cards in 18 sets. For 100% you have to collect 15 sets completely.
What do I get for 100% in GTA 6?
The trophy or achievement “A Long Road”.
Sources: PowerPyx · Rock Paper Shotgun · IGN Germany